Each LMS available on the market gives you the possibility to create courses. While our tool, distinguished by simplicity and intuitiveness, does a great job of maintaining functionality.
This article is intended to guide you through the available features of the course creator, including their detailed description. You will also find several useful tips on how to utilize the potential of self-created courses fully.
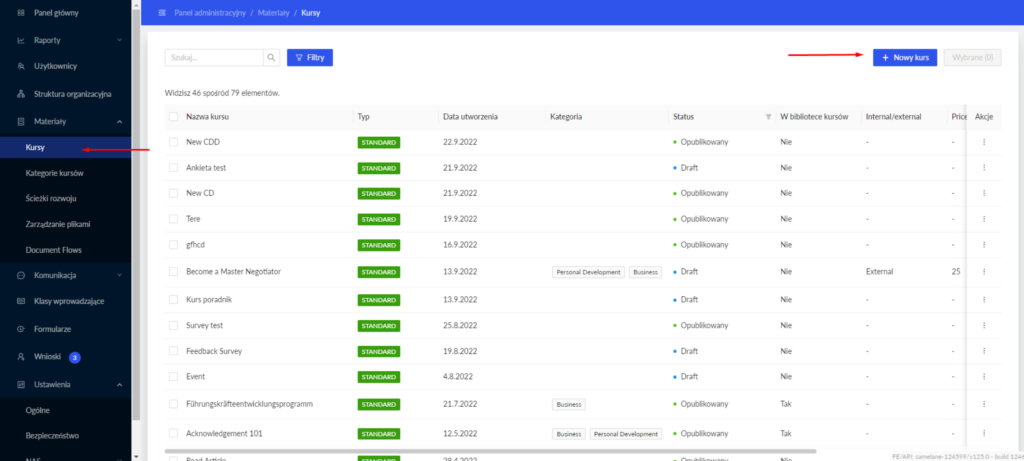
- As an administrator, in order to create a new course, you must log in to the Admin Panel, go to the Courses tab in the menu on the left, and click the New Course button.
- In the next step, you will have to choose one of the following types of courses:
– Standard: e-learning,
– Event: applies to courses that require multiple users to attend at the same time. You can choose whether the course will take place in a classroom, will be held as a webinar, or you can go for a hybrid. This course type will be a great option for guest lectures or trainings requiring students take part in a training at the same time as the instructor.
– Exam: a test containing single and multiple-choice questions used to verify the knowledge of the Academy’s users.
– AR Instructions: is an additional type of course that allows you to conduct AR Instructions using Augmented Reality technology. These courses enable participants to learn and practice skills in a real-life workplace enriched with digital elements. Participants observe the working environment and interact with the machines, guided step by step by a defined training procedure. If you want to make it easier for users to acquire practical skills through AR training, please contact support@samelane.com for more information.
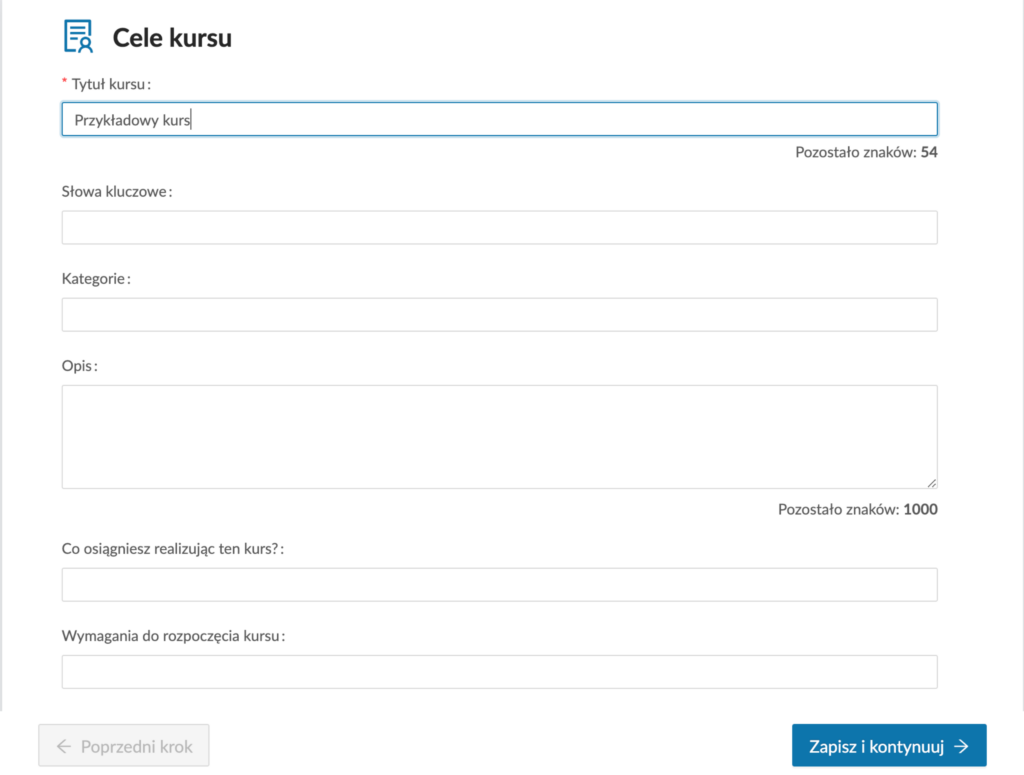
- In the next step, the administrator enters the course objectives:
- Course name (required field),
- Keywords: the course will be possible to find after the user enters at least one of these words into the search engine,
- Category-Select: a category to which the course will be assigned. You can edit the categories in a dedicated tab in the Admin Panel.
In addition, there are fields where you can enter information, such as:
- Course description: brief information about what users can expect from the course. It is worth indicating who the course is addressed to, what it is about, and what the agenda would be.
- What are the gains of completing the course: additional motivation of the platform users. Clearly defined goals affect the positive reception of the course.
- Requirements for starting the course: if a user is obliged to complete other courses beforehand or hold a specific position in the organization, it is worth specifying in the essential requirements.
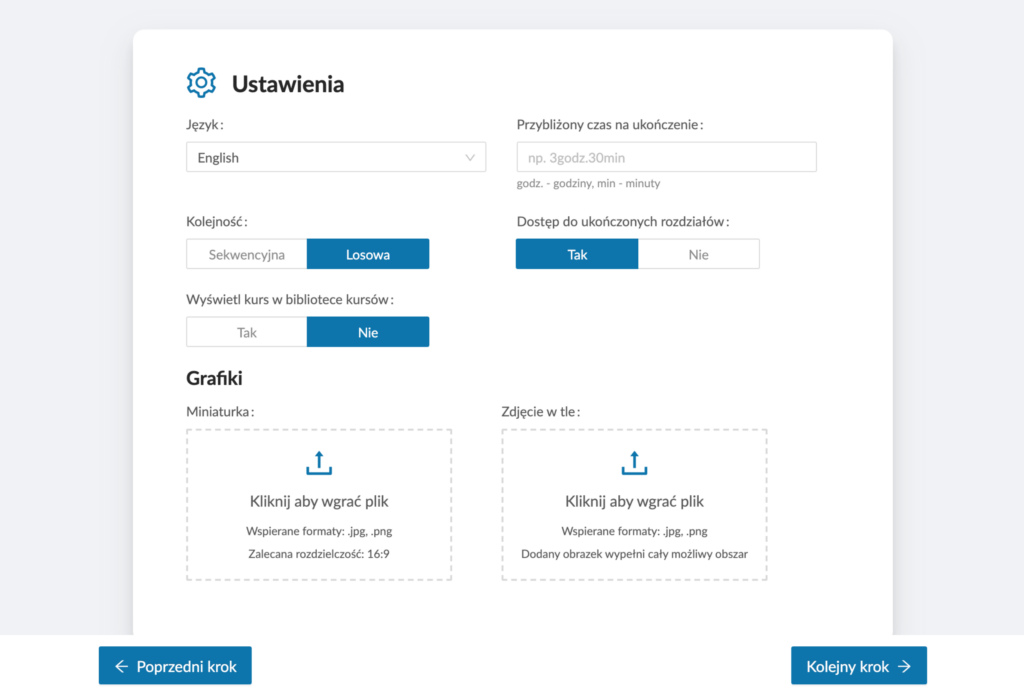
- After navigating to the Settings section, you can enter the following:
- Course Language,
- Approximate time needed to complete — useful information helping students estimate the time they need to complete the course,
- Course chapters play order — sequential order guarantee, the lessons will be displayed according to the order of adding them to the creator. It is the most common setting that allows you to control the order of the information that is presented to the user,
- Accessing Completed Chapters – Selecting Yes enables the user to return to previous lessons and repeat them at any time. If you suspect that the user may often want to return to the provided course information, we recommend unlocking this option. However, in case the course ends with a quiz — it will be more reasonable to block this possibility for the user.
- View the course in the course library — if Yes is checked, the created course will be added to the training library. Users will be able to enroll without having to assign the course to an account. This view is particularly useful for courses open to all employees.
Important! We recommend unblocking this option only for the demo courses if your academy is commercial. Otherwise, users will be able to assign the lesson to themselves.
- Graphics — will be displayed on the course preview page.
- The administrator can set course access for all or only the selected organizational units in the Access section.
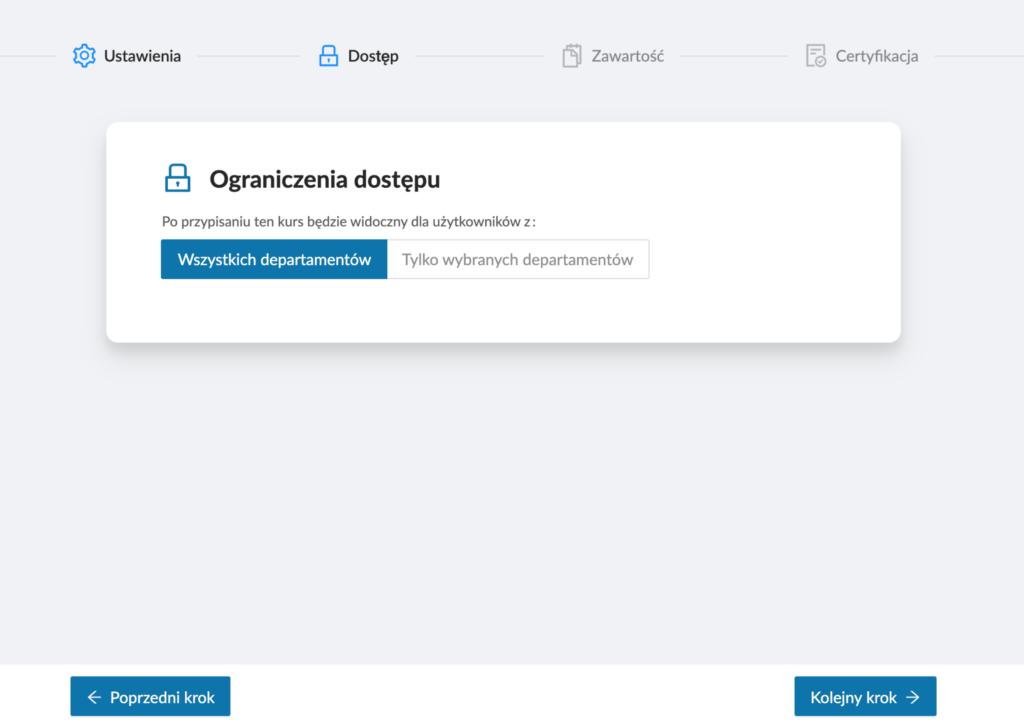
If you pick only the selected branches, administrators from other departments will not be able to assign courses to their users. When the course is to be displayed in the Library, only the users from the indicated units will see it.
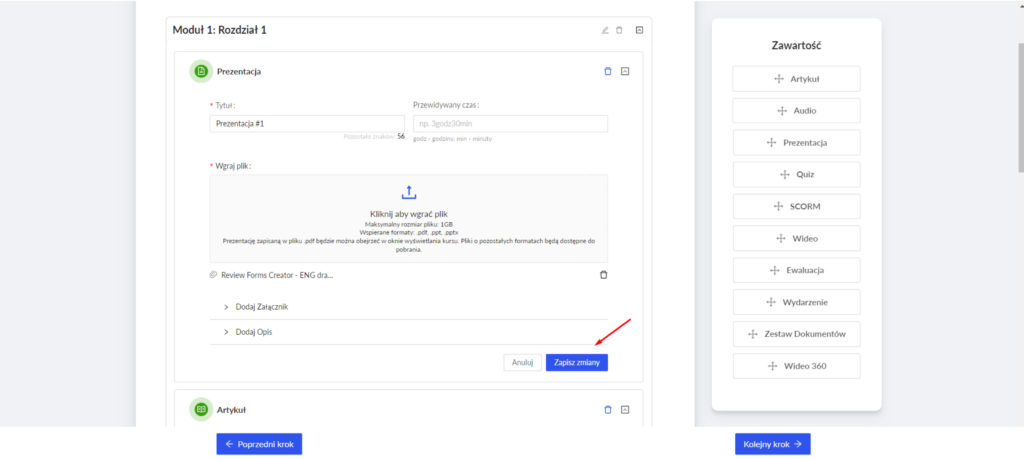
6. In the Contents section, you create the training content by using the drag and drop tool. You can move tiles corresponding to different types of content: Article, Audio, Presentation, Test, SCORM file, and Video from the menu on the left to the Contents field visible on the right.
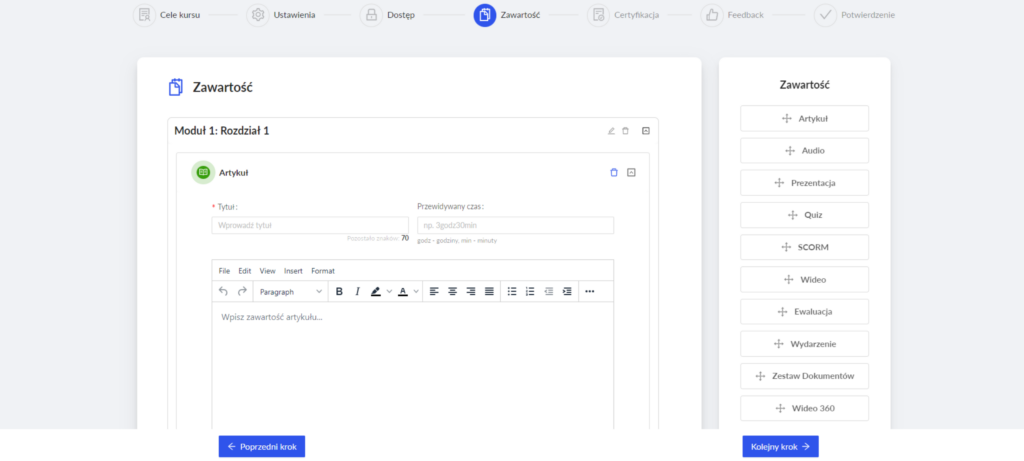
All changes made to the content should be saved by clicking the Save Changes button. It is displayed on each item.
We recommend grouping the lessons appropriately to improve the readability of the course. When working with extensive courses that need to be updated or edited, the appropriate arrangement of modules and chapters will make it easier for you to find the lesson you want to change. Once you have added the necessary items, use the Preview option (button at the bottom) to ensure the course is complete.
7. In the Certification step, you can add a certificate of course completion by entering its title, background, and content.
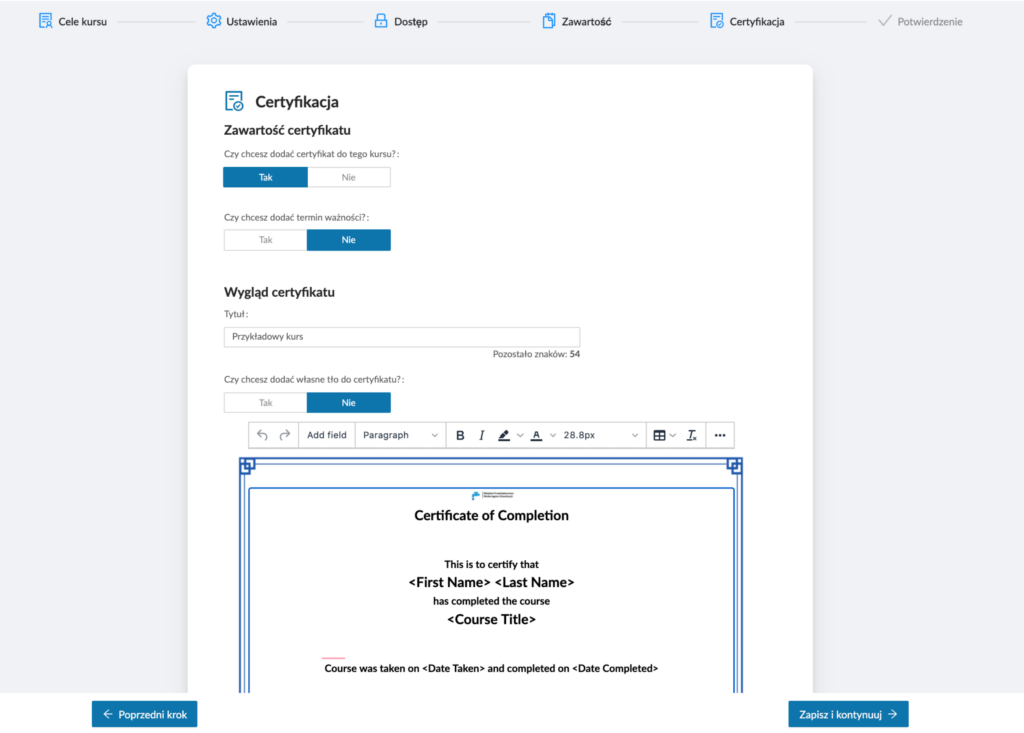
Additionally, you can enter some dynamically changing elements by clicking the Add Field button. Some information will be retrieved from the academy (for example, First Name, Last Name, and Course Title). You can also automatically add information about the course’s start and end dates, as well as the expiration date of the certificate.
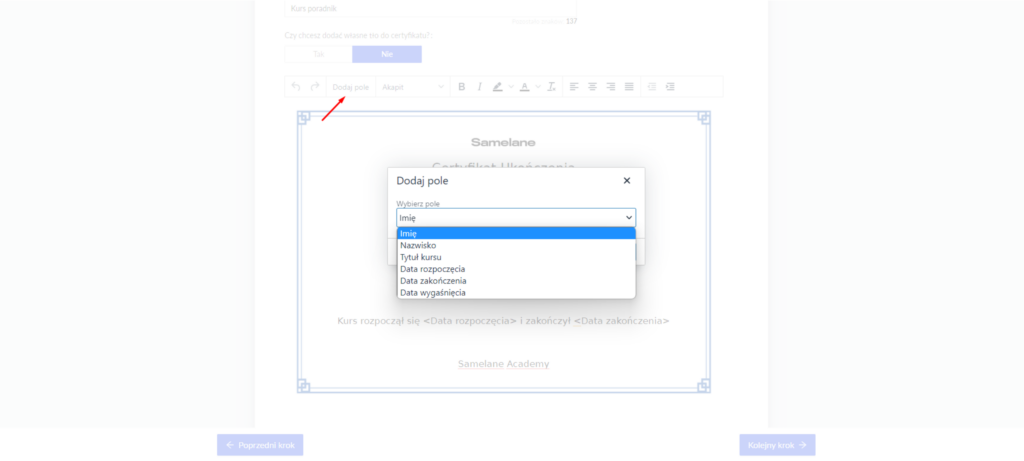
Personalization of certificates is particularly useful in the case of commercial academies. If your training is considered renowned, the academy users might want to document their completion and have a chance showing it off in front of external entities.
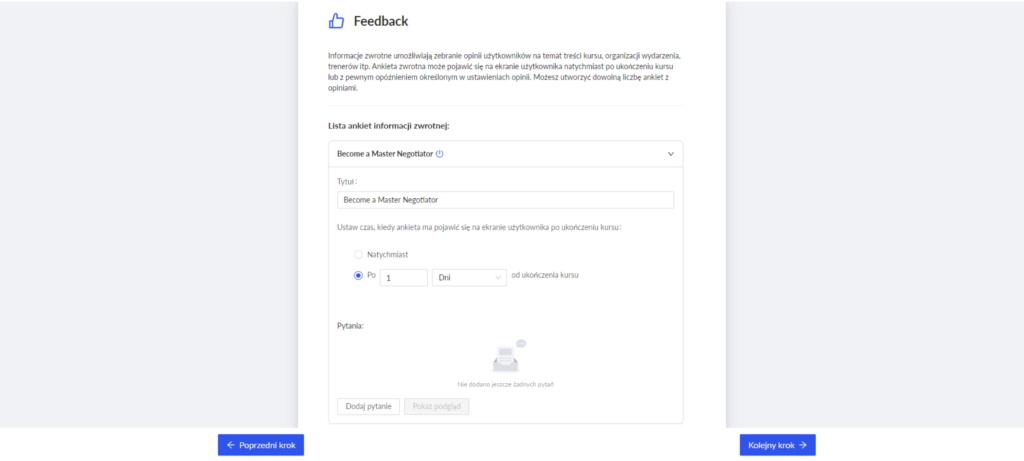
8. The next step is adding a feedback option. After clicking Add Feedback button, a window will open as in the screenshot below. You can edit the title here, choose sending time, and add questions aimed at collecting as much information as possible. You will use the collected data to improve your course.
You can send inquiries to users after a specific time. For example, you can request your first feedback directly after completing the course and then again after three months. In addition, it allows for gathering information from already deployed employees and checking whether the course has fully prepared the participants for their positions.
9. In the final step, you can publish the course or save it as a Sketch.
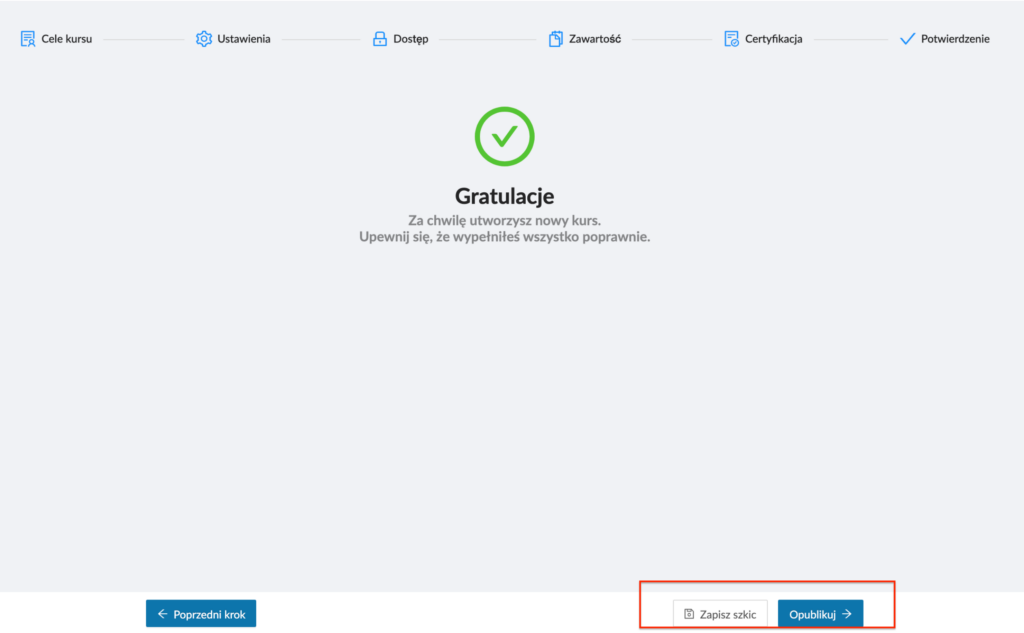
Saving a sketch allows you to keep a draft of the course you are working on and share it with colleagues for refinement or discussion. This is particularly useful when a course is coordinated by more than one person.
Once published, the course is ready. There are several ways to assign a course to platform users. You can learn more about course assignments in this article.